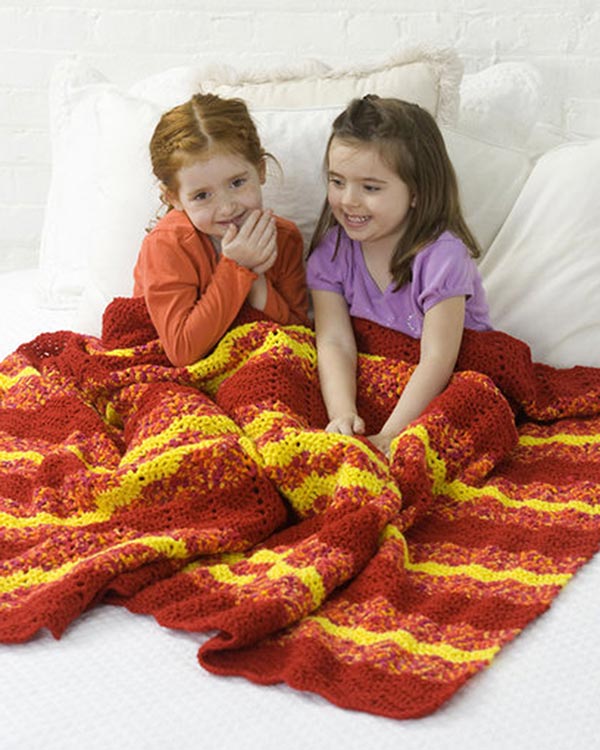
From RedHeart.com
Baby Steps
LW1454
Designed By: Michele Thompson
Skill Level: Easy
Red Heart® “Soft Baby®”, Art. E705 (7 ounce/575 yard skein): 12 Ounces No. 7881 Powder Blue CA, 11 ounces No. 7737 Powder Pink CB, 7 ounces No. 7001 White CC.
Blanket measures approximately 36″ x 40″.
GAUGE: Square = 3″ x 3″; Rectangle = 3″ x 5″ using 2 strands yarn and larger hook.
CHECK YOUR GAUGE. Use any size hook to obtain the gauge.NOTE: Hold 2 strands of the same color together throughout.
CHECK YOUR GAUGE. Use any size hook to obtain the gauge.NOTE: Hold 2 strands of the same color together throughout.
SQUARE A (Make 35): With larger hook and CA, ch 3; join with a sl st to form a ring.
Rnd 1: Ch 3, 2 dc in ring, ch 3, [3 dc in ring, ch 3] 3 times; join with a sl st to top of ch-3.
Rnd 2: Sl st across next 2 dc and into sp; ch 3, (2 dc, ch 3, 3 dc) all in same ch-3 sp, ch 1, [(3 dc, ch 3, 3 dc) all in next ch-3 sp, ch 1] 3 times; join with a sl st to top of ch-3.
Fasten off.
Rnd 1: Ch 3, 2 dc in ring, ch 3, [3 dc in ring, ch 3] 3 times; join with a sl st to top of ch-3.
Rnd 2: Sl st across next 2 dc and into sp; ch 3, (2 dc, ch 3, 3 dc) all in same ch-3 sp, ch 1, [(3 dc, ch 3, 3 dc) all in next ch-3 sp, ch 1] 3 times; join with a sl st to top of ch-3.
Fasten off.
SQUARE B (Make 30): Work same as Square A with CB.
RECTANGLE A (Make 28): With larger hook and CB, ch 14.
Row 1 (Right Side): Dc in 6th ch from hook, dc in next 2 ch, ch 1, skip next ch, dc in next 3 ch, ch 1, skip next ch, dc in last ch. Fasten off.Rnd 1: With right side facing, attach CC in ch 1 sp at end of last row; ch 3, 2 dc in same sp, ch 3, 3 dc over dc at end of row, ch 3, 3 dc over last skipped ch, ch 1, 3 dc over next skipped ch, ch 1, (3 dc, [ch 3, 3 dc] twice) all in beg ch-5 sp, ch 1, 3 dc in next ch-1 sp, ch 1; join with a sl st to top of ch-3. Fasten off.
Rnd 2: With right side facing, attach CA in first ch-3 corner sp after the joining; ch 3, (2 dc, ch 3, 3 dc) all in same sp, * ch 1, (3 dc, ch 3, 3 dc) all in next corner ch-3 sp, ch 1, [3 dc in next ch 1 sp, ch 1] twice **, (3 dc, ch 3, 3 dc) all in next corner ch-3 sp; rep from * to **; join with a sl st to top of ch-3. Fasten off.
RECTANGLE B (Make 24): Work same as Rectangle A EXCEPT use CA to start and for Row 1; CC for Rnd 1; and CB for Rnd 2.
FINISHING: Sew pieces together as follows:
Strip A (Make 7): [Square A, Rectangle A] 4 times, Square A.
Strip B (Make 6): [Square B, Rectangle B] 4 times; Square B.
Now sew strips together as follows: [Strip A, Strip B] 6 times, Strip A. Weave in ends.
Strip A (Make 7): [Square A, Rectangle A] 4 times, Square A.
Strip B (Make 6): [Square B, Rectangle B] 4 times; Square B.
Now sew strips together as follows: [Strip A, Strip B] 6 times, Strip A. Weave in ends.
Edging-Rnd 1: With right side facing and smaller hook, attach CC in any corner; ch 1, * work 3 sc in corner, sc to next corner taking care to keep work flat; rep from * around; join with a sl st to first sc.
Picot Edging-Rnd 2: * Ch 2, sl st in 2nd ch from hook, skip next sc, sl st in next 2 sc; rep from * around, adjusting as necessary at corners and end of rnd to keep work flat; join. Fasten off. Weave in ends.
Picot Edging-Rnd 2: * Ch 2, sl st in 2nd ch from hook, skip next sc, sl st in next 2 sc; rep from * around, adjusting as necessary at corners and end of rnd to keep work flat; join. Fasten off. Weave in ends.
Be sure to…
Visit my Website
Join me on Facebook
Subscribe to the Maggie Weldon YouTube Channel for more crochet lesson videos
Subscribe to Maggie’s Crochet YouTube Channel for product reviews
Sign Up for My Newsletter
Follow us on Pinterest
Follow us on Twitter


No Comments