From RedHeart.com
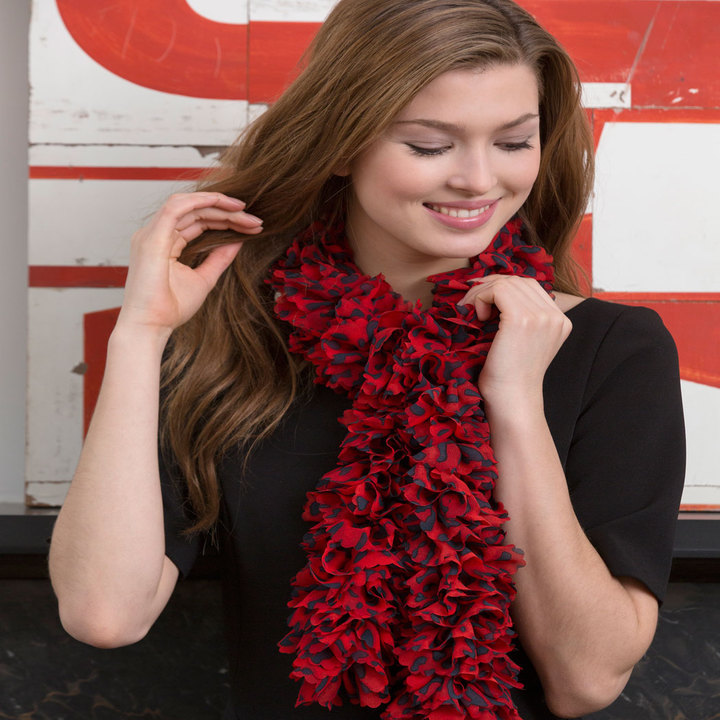
Full Ruffle Crochet Scarf
Brighten your look with this ruffled scarf in a chic print! It’s easy to crochet through the evenly-spaced holes in the scalloped fabric strip.
Pattern #: LW4170
Designed by: Bendy Carter
Project Type: Scarves/Shawls
Required Supplies:
- RED HEART® Boutique Sassy Fabric™: 1 hank 9947 Red Leopard
- Susan Bates® Crochet Hook: 8mm [US L-11]
- Yarn needle
Additional Supplies Needed:
Locking stitch marker (OR safety pin)
GAUGE: Gauge is not critical for this project.
Scarf measures 4” x 42” (10 x 106.5 cm)
Special Stitches
Ch = insert hook from front to back through next hole, draw top edge through loop on hook.
Slip st = insert hook in front loop of indicated chain or stitch and in next hole, draw top edge through chain or stitch and loop on hook.
Ch = insert hook from front to back through next hole, draw top edge through loop on hook.
Slip st = insert hook in front loop of indicated chain or stitch and in next hole, draw top edge through chain or stitch and loop on hook.
Notes
1. Work into the holes at the top edge of the fabric strip. Always insert hook in hole from front to back of fabric.
2. If you prefer to work from the center of the hank rather than the outer edge, slide the paper band to one end, remove the cardboard, and gently pull out the fabric.
3. Prepare the fabric for stitching by trimming the cut edge in a curve. Begin cutting at the top edge before the first hole and end at the bottom edge below the 2nd hole.
4. Always turn piece clockwise so that working fabric is behind stitches just made.
SCARF
Fold fabric so first hole is placed over 2nd hole, insert hook in hole through both thicknesses, insert hook in next hole and draw top edge through loop on hook (slip knot made), ch 4.
Row 1: Turn, working in front loops only, slip st in 2nd ch from hook and in each ch across, turn—3 slip sts.
Row 2: Ch 1, working in front loops only, slip st in each st, turn.
Repeat Row 2 until at least 5 (but no more than 8) holes remain.
Place last stitch on locking stitch marker or safety pin so stitch doesn’t unravel as you prepare fabric for last row. Trim fabric so that only 5 holes remain. Cutting from outer edge,trim fabric to ¼” (6.4 mm) under last 2 holes, then continue cutting on a curve ending at the bottom edge under the 3rd hole. Remove stitch holder and place loop back on hook.
Last Row: Ch 1, working in front loops only, slip st in each st; insert hook in last hole and pull end tail through loop on hook. Tighten end tail until knot forms.
FINISHING
Weave in end.
Weave in end.
ABBREVIATIONS
ch = chain; st(s) = stitch(es).
ch = chain; st(s) = stitch(es).
Be sure to…
Visit my Website
Join me on Facebook
Subscribe to the Maggie Weldon YouTube Channel for more crochet lesson videos
Subscribe to Maggie’s Crochet YouTube Channel for product reviews
Sign Up for My Newsletter
Follow us on Pinterest
Follow us on Twitter


No Comments