While most needlework originated out of necessity, it flourishes out of a need to create something beautiful and a need to share that beauty with loved ones.
Judging by the great condition of many vintage potholders, I don’t think they were used in cooking that much. Working them with crochet cotton thread makes them rather unsafe in protecting your hands from hot pans. If you want to actually use these vintage potholder designs in cooking I highly suggest lining the inside with a store bought potholder or layers of cotton quilt batting. Another good idea would be to set hot pans on the backside of your potholder to protect the front from scorch marks. I have seen a few old potholders that have a cotton backing added to them that shows signs of scorching. The front of the potholder is like new but the back shows all the ware and tear from use.
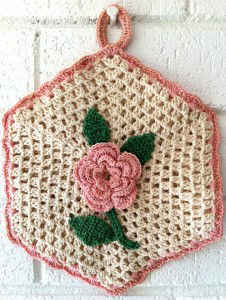
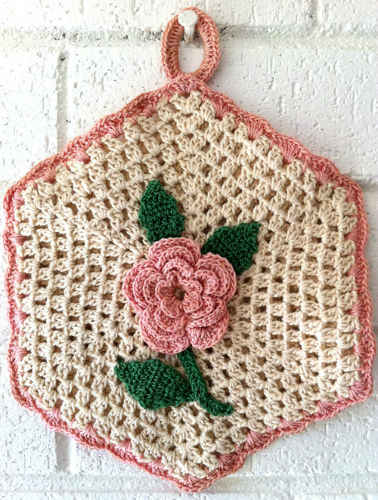
Camille Rose Vintage Potholder
FP312
Edited By: Maggie Weldon
Copyright 2010 Maggie Weldon
Skill: Easy
Size: About 7” across widest point.
Materials: Size 10 Crochet Thread: White, Pink, Green
Crochet Hook: Steel size 7 (1.65 mm)
Special Stitches
Shell: (2 dc, ch 2, 2 dc) in same st or sp indicated.
SIDES (Make 2)
Rnd 1: (Right Side) Starting at center, with White, ch 5, join with sl st to first st to form ring; ch 5 (counts as first dc and ch 2, now and throughout), * 2 dc in ring, ch 2; rep from * 4 times, dc in ring; join with sl st to first dc. (12 dc, 6 ch-2 sps)
Rnd 2: Sl st to ch-2 sp, ch 5, 2 dc in same sp, ch 2, * Shell in next sp, ch 2; rep from * 4 times, dc in first sp; join. (6 Shells)
Rnds 3-10: Sl st to ch-2 sp, ch 5, 2 dc in same sp, ch 2, * (2 dc in next ch-2 sp, ch 2) across to Shell, Shell in Shell, ch 2; rep from * around, ending with dc in first sp; join.
At the end of Rnd 10 there are 6 Shells and 8 2-dc groups between each Shell.
ROSE
Rnd 1: (Right Side) Starting at center, with Pink, ch 12, join with sl st to first ch to form ring; ch 1, (sc in ring, 3 dc in ring) 5 times; join with sl st to first sc. (5 petals)
Rnd 2: Working behind petals, (ch 4, sl st in bottom of next sc) around. (5 ch-4 lps)
Rnd 3: Ch 1, (sc, 5 dc, sc) in each ch-4 lp; join with sl st to first sc. (5 petals)
Rnd 4: Working behind petals, (ch 6, sl st between next 2 sc) around. (5 ch-6 lps)
Rnd 5: Ch 1, (sc, 8 dc, sc) in each ch-6 lp; join with sl st to first sc. (5 petals)
Rnd 6: Working behind petals, (ch 8, sl st between next 2 sc) around. (5 ch-8 lps)
Rnd 7: Ch 1, (sc, 10 dc, sc) in each ch-8 lp; join with sl st to first sc. (5 petals) Finish off and weave in ends.
LEAVES (Make 3)
Row 1: (Right Side) Starting at base, with Green, ch 2, 2 hdc in 3rd ch from hook. (2 hdc)
Row 2: Ch 1, turn, 2 hdc in first hdc, hdc in next 2 hdc. (4 hdc)
Row 3: Ch 1, turn, hdc in first hdc, 2 hdc in next 2 hdc, hdc in last hdc. (6 hdc)
Row 4: Ch 1, turn, 2 hdc in first hdc, hdc in next 4 hdc, 2 hdc in last hdc, (8 hdc)
Row 5: Ch 1, turn, hdc in each hdc across. (8 hdc)
Row 6: Ch 1, turn, hdc dec, hdc in next 4 hdc, hdc dec. (6 hdc)
Row 7: Ch 1, turn, hdc dec, hdc in next 2 hdc, hdc dec. (4 hdc)
Row 8: Ch 1, turn, hdc in next 2 hdc, hdc dec. (3 hdc)
Row 9: Ch 1, turn, hdc in first hdc, hdc dec. (2 hdc) Finish off leaving long end.
STEM
Row 1: (Right Side) With Green, ch 16, hdc in 3rd ch from hook, (hdc in next ch) across. Finish off leaving long end.
Assembly
– With right side of one Side facing, position Rose in center.
– Position Leaves and Stem around Rose and using long ends, sew in place.
– Sew Rose in place.
Edging
Rnd 1: With right sides of both Sides facing (wrong sides together), working through both thicknesses, join Pink with sl st to any Shell ch-2 sp, ch 3, 5 dc in same sp, sc in next ch-2 sp, (6 dc in next ch-2 sp, sc in next ch-2 sp) around; join with sl st to first dc. Finish off and weave in ends.
Ring
Rnd 1: (Right Side) With Pink, ch 18; join with sl st to first ch to form ring; ch 1, 40 sc in ring; join with sl st to first sc. Finish off leaving long end.
– Using long end, sew Ring to the back of top corner of Potholder.
All Rights Reserved ©2010 Maggie Weldon
Enjoy,
Maggie


thanks for the pretty patterns that you are posting it is the biggest help for me to stay sain HUGS ME
This reminds me of potholders I saw in my Mothers and Grandmothers kitchens when I was a child growing up. Brings back memories. CW of OHIO