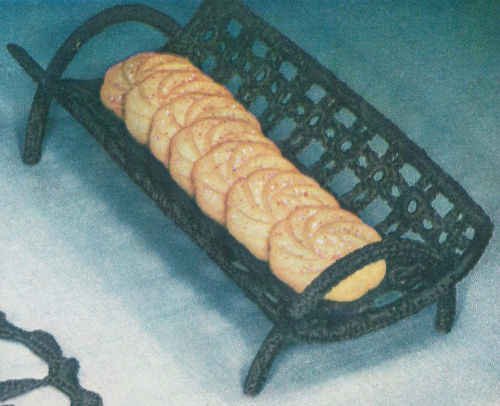
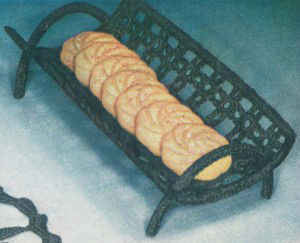
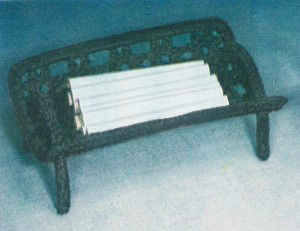
This unique design comes from a book called Wrought Iron Crochet, published in 1954 by Lily. In black these designs do look just like wrought iron. Imagine this design worked in vibrant colors to match your kitchen décor. If you make this design please send pictures. We would love to see them.
Included in the book are directions for starching as follows: Dissolve 2 heaping tablespoons Argo Gloss Starch in ½ cup cold water, add to 1 quart warm water, heat and boil briskly for several minutes, stirring constantly. Add 2 cups cold water and cool until comfortable to handle. Dip crochet in starch, squeezing the starch thru it thoroughly. Remove, squeeze out excess starch, roll in paper towels and leave for an hour or two. Then rub off any excess starch with paper towel, stretch and block as given in individual instructions.
Wrought Iron Cookie Baskets
FP329
Edited By: Maggie Weldon
Copyright 2011 Maggie Weldon
Skill: Easy
Size: Large Basket – About 5” by 10” by 2½”
Small Basket – About 4¼” by 6” by 2”
Materials: Lily Double Quick: Black – 2 skeins; Black covered Millinery Wire (or other stiff wire); Yarn needle.
Crochet Hook: Steel size 3 (2.10 mm).
JOINING WITH SC
When instructed to join with sc, begin with sl knot on hook, insert hook in st or sp indicated, yo and pull up a loop, yo and draw through both loops on hook.
LARGE BASKET
First Motif
Rnd 1: (Right Side) Starting at center, ch 8, join with sl st to first ch to form ring; ch 1, 12 sc in ring; join with sl st to first sc.
Rnd 2: * Ch 4, sl st in same sc, sl st in next 2 sc, ch 4, sl st in same sc with last sl st, mark this 2nd picot with a pin **, sl st in next sc; rep from * twice and from * to ** once. Finish off leaving 6” long end. Thread long end to needle and finish off on back.
Second Motif
Rnd 1: Rep Rnd 1 of First Motif.
Rnd 2: Ch 2, sl st in marked 2nd picot on First Motif, ch 2, sl st in same sc on Second Motif, sl st in next 2 sc, ch 2, sl st in next (first) picot on First Motif, ch 2, sl st in same sc with last sl st on Second Motif, sl st in next sc; complete as for First Motif.
Remaining Motifs (Make 43)
Rnd 1: Rep Rnd 1 of First Motif.
Rnd 2: Work as for Second Motif, joining third Motif to 2 side picots on Second Motif. Join a 4th Motif to 2 picots each on third and first Motifs. Join 9 Motifs across by 5 Motifs long.
Edging
Rnd 1: With right side facing, join with sl st to first free picot on one corner Motif, * ch 2, sc in next picot, ch 4, sc in next picot, (ch 2, sc in next picot, ch 5, sc in first picot on next Motif) across to next corner Motif; repeat from * around; join.
– Cut 2 wires to reach around Basket, plus 1 inch for overlap.
Rnd 2: Ch 1, working over 2 wires, sc in same st as joining, work sc around: * 2 sc in each ch-2 sp, 5 sc in each ch-4 and ch-5 sp, * sc in each sc; before completing Rnd, overlap ends of wire and wrap with gummed tape. Finish Rnd and join.
Rnd 3: Ch 1, sc at base of same sc, working over last rnd, rep Rnd 2 from * to *; sc at base of each sc; join.
LEGS (Make 2)
– Cut 3 wires 7 inches long, hold together and wrap both ends with gummed tape. Cover wire with crochet rope.
Crocheted Rope: Ch 2, 7 sc in 2nd ch from hook. Cup 7 sc with right side inside, working in back loops only, sc in first sc, (sc in next sc) around and around for ½ inch, push one end of wires into it and continue working around outside of wire until it is covered, always having 7 sc in a rnd at all times. Close with sl sts. Finish off and weave in ends.
– Bend Leg into a half circle.
-Rep for second Leg.
SMALL BASKET
Make 20 Motifs as for Large Basket and join 5 Motifs across by 4 Motifs long.
Repeat Edging as for Large Basket.
LEGS (Make 2)
– Cut 2 wires 5½ inches long, hold together and wrap both ends with gummed tape. Cover wire with crochet rope.
Crocheted Rope: Ch 2, 6 sc in 2nd ch from hook. Cup 6 sc with right side inside, working in back loops only, sc in first sc, (sc in next sc) around and around for ½ inch, push one end of wires into it and continue working around outside of wire until it is covered, always having 6 sc in a rnd at all times. Close with sl sts. Finish off and weave in ends.
– Bend Leg into a half circle.
-Rep for second Leg.
Finishing – use Photo as guide.
– Starch Baskets and Legs.
– Pin Baskets right-side-up in true shape. Press flat thru a cloth. When dry, bend ends of Baskets in a quarter circle. Pass a Leg through open space between first 2 Motifs on each side at one end of Basket (next to Edge) and sew securely. Repeat at other end. Measure ends of legs exactly so Baskets stand true and even.
All Rights Reserved ©2011 Maggie Weldon
Enjoy,
Maggie


No Comments